User Manual
Standard functions
Page Settings
Each application page has an icon that allows you to customize the page content.

Auto-refresh drop-down list -
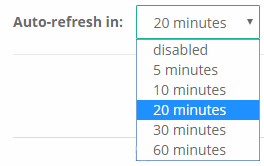 The page settings include a function to define how often a page will refresh. When an auto-refresh time frame is defined, the Auto-refresh icon
 will be animated.
(Items) per page drop-down list - 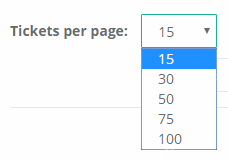 Each function (Tickets, Users, Audits, Change Logs) where items are listed, the maximum number of items can be defined in this drop-down list. If the function supports a 'batch edit' feature, that action will be limited to the items displayed on the page.
Profile
Clicking on the [Profile] icon  followed by clicking on the [my profile] icon
  opens a page to change information associated with the logged-in user.
- First name
- Last name
- Roles
- Time zone
- Password
- Password confirmation
- API key
Help/Documentation
The [Help/Documentation] icon  opens the application Documentation
Log out
The [Sign Out] icon  exist the application
Dashboard
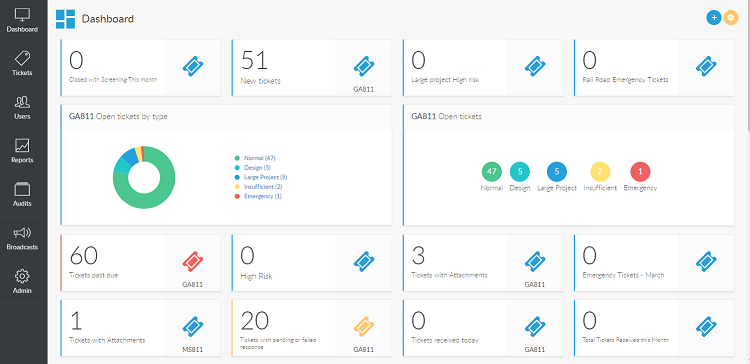
BOSS811 Dashboard is designed to display a wide variety of data summaries to quickly keep track of service request tickets, ticket assignments and workload. A variety of “widgets” dynamically analyze the tickets and present pictorial summaries. They are meant to consolidate the ticket details while highlighting the unusual circumstances that need to be managed.
Some widgets act as a link to the tickets represented by the widget information. For example, the Incoming Tickets widget will display a list of the tickets represented by the count in that widget.
How to add/change/remove dashboard widgets
When you first open the Dashboard, no widgets are displayed. Click on the 'Add dashboard widgets' button to see all of the available data widgets. Review each widget and when you find one that you want to add to the Dashboard, click on the (“+ Add widget”) icon, and the widget will then display “On dashboard”.
When you re-open the Dashboard, only those selected widgets will be displayed. You can drag each widget to reorder them. Click on the “x” in the upper right corner to remove a widget.
You can review the list of available widgets by clicking on the [Add Dashboard Widget] icon 
Tickets
BOSS811 Tickets are utility location service requests issued by your state's 811 agency. Each ticket is a summary of one or more Service Area codes associated with the utility location service request submitted by the requester. The same utility location service request can be delivered to multiple agencies if multiple agencies are potentially involved with the utility locate request.
Tickets are listed in the Simple Search tab and in the Advanced Search tab on the Ticket screen.
Each line in the Simple Search and in the Advanced Search ticket list is a summary of the information from each ticket. This information is a combination of the information gathered from the requester when the utility locate service request is created as well as fields updated on the ticket.
Click on the ticket number to open individual tickets. You can sort tickets by clicking on the column title and an arrow will show the sort order. Click on the column title again to reverse the sort order.
A count of displayed tickets is shown in the upper left corner of the Tickets screen.
Simple Search
Simple Search allows a quick way to filter the list of tickets.
Simple Search filter options:
| Option | Description |
|---|---|
| Assignee | Dynamic list of utility locators assigned to tickets |
| Status | Open (includes both Incoming and Assigned), Any, Incoming, Assigned, Closed |
| Ticket Type | Damage, Design, Emergency, Insufficient, Large Project, Normal |
| Call Center | Select the call center you want to filter tickets for |
| Go (button) | Apply the filter to the list of tickets |
| Clear search (button) | Restore the ticket list with no filtering |
You can combine different types of search criteria for your return set. For example, you can find all tickets assigned to a specific locator (Assignee) where the tickets are flagged as emergency (Request type).
The columns listed in the Simple Search result set are:
| Column | Description |
|---|---|
| [ ] | Checkbox to select multiple tickets for bulk edit/bulk close |
| Type | Normal, Emergency, Insufficient, Damage, Large Project & Design |
| No. | 811-assigned ticket number |
| SA | Service Area. The primary type of utility assigned to the utility locate service request. The ticket can contain multiple service areas |
| Status | The current status of this ticket. Status values are: |
| Open - Both Incoming (unassigned) and Assigned tickets | |
| Any - All Status values | |
| Incoming - Newly received and not yet assigned to a utility locator | |
| Assigned - Assigned to a utility locator but not yet closed/completed | |
| Closed - A resolution code has been assigned to this ticket | |
| Assignee | Utility locator assigned to this ticket |
| Digsite Address | Address information provided by the contractor/requester |
| Work type | A description of the work to be done at this location, provided by the contractor/requester |
| Due Date | Assigned by the contractor/requester |
| Call Center | Call Center where the ticket was submitted from |
Simple Search has a predefined set of data columns for the return data set.
Advanced Search
Advanced Search is a robust capability to define, save and re-execute complex filtering criteria. They contain filtering groups and associated filters where “all” or “any” of the filtering groups can be applied to the return set.
The columns available for an Advanced Search filter contains all data associated with a ticket:
-
Data delivered by the 811 agency service request
-
Additional fields created by the BOSS811 application (such as tags)
-
Any custom field added to the application
Defining a new filter
The steps to defining a new filter:
- Click on the Tickets icon

-
Open the Advanced Search Configuration form - Click on the Configure Search button

-
. Define a filter group – Click on the [Add a filter group] button

-
Choose whether any or all of the selection criteria in the filter should be applied by clicking on the dropdown list of ‘any’ or ‘all’ in the “Show results where any/all of the following match” button.

For example, use the "any" option to select records where the status = Incoming” or the status = “Assigned”. If you needed both conditions met to select a ticket, use the "all" option.
-
Define a filter – Click on the [Add a filter] button

-
Select a field to use in the filter.
-
Select an action to take on the selected field
-
Select a value to use in the filter (if applicable)
-
Select the fields/columns you want in the return set.
-
Click on the [Apply] button
 to see the results of the filter.
Click on the [Save search] button to save the filter and to save the columns displayed in the result set.
Click on the [Clear] button to reset the filtering.
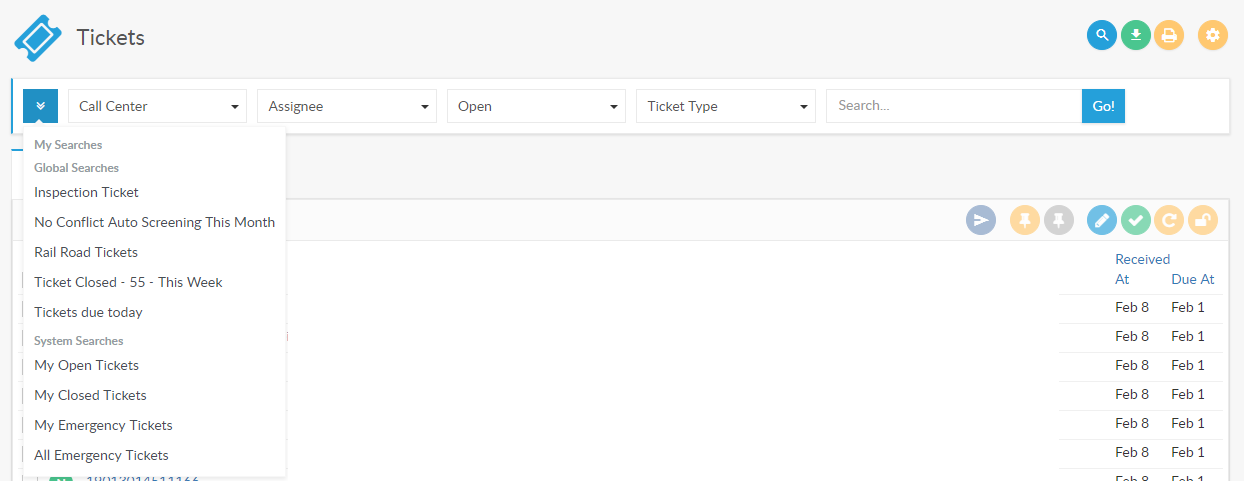
Running a saved search
A list of saved searches is listed in the "Saved searches: dropdown list. Click on the name of the saved search to execute the saved filter.
You can edit the search criteria before re-executing the search by clicking on the advance search icon after you run your saved search. For example, if a date range was specified when the advanced search criteria were saved, you can modify the date range and re-run the search. Click on the [Apply] button to re-execute the search criteria.
Users
Each user in BOSS811 is assigned a specific level of access or “role”. Role access is defined in the Settings – Roles configuration. You can customize each role to limit or grant permissions and customize user functionality as needed to match the responsibilities the user has in your organization.
Once a role is defined, it is associated with a user on the Users screen.
The default User view is the [Search] button which displays a list of existing users. You can use the Filter function to display accounts that match the filter criteria.
Create a New User
To define a new user, Use the following steps:
-
Click on the Users icon

-
click on the [New user]
 button and enter:
 -
First name (optional)
-
Last name (optional)
-
E-mail address (required) – used by the BOSS811 application to communicate with the user and it is the UserId to log into the application
-
Roles (optional) – Defines the access level for this user. You can assign multiple roles and the highest level of access will be granted when roles conflict
-
Time zone (required)
-
Password & Password confirmation (required) – The user’s account password to log into the application. Minimum of 8 characters
-
Active (optional) – ability to disable an account without deleting the account
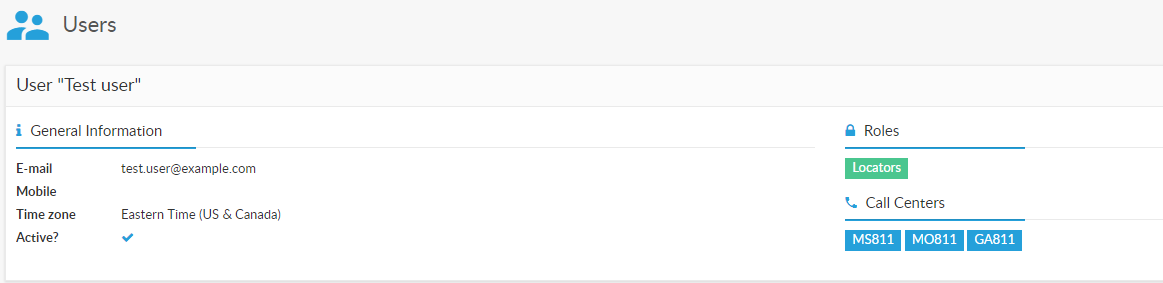
Change Information for an Existing User
Click on a user name to display the user information. You will see the information listed for this user. Click on the [Edit]button to change user information or disable an active account.
API Key
API key provides a way for mobile application and other third-party integrations to perform requests on behalf of user. When the user's API key is compromised(e.g. a lost smartphone) the API key can be re-generated from the web application to disable access to the account.
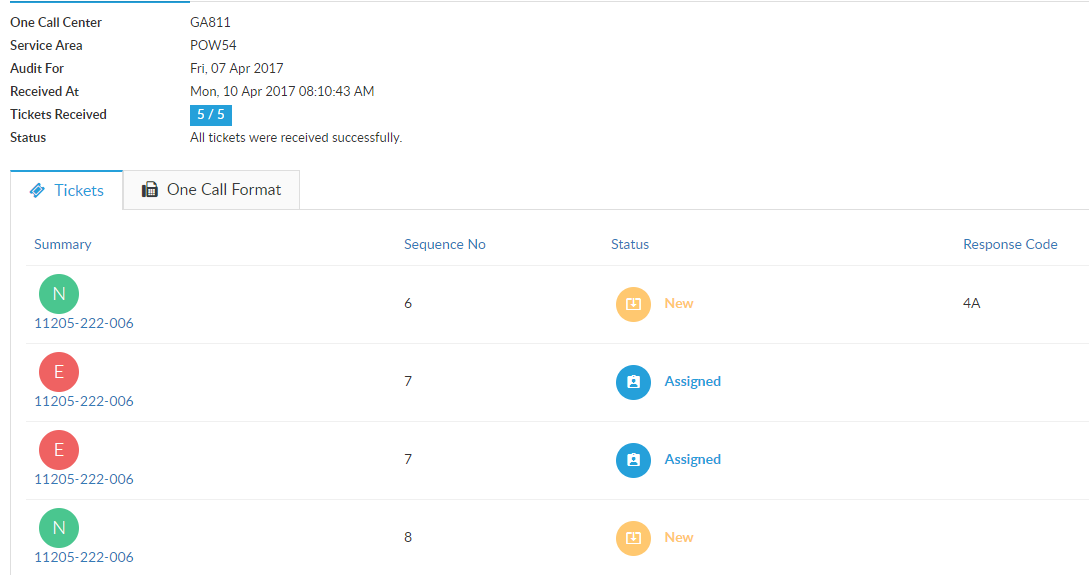
Audits
Your state’s 811 agency provides daily summary reports, one for each of the service areas for your organization. This screen displays a list of the audit reports. Each service area code that is used by your organization has it's own daily report.
Click on the Audit date to open a daily audit report. The contents of a daily audit report can be viewed using one of the two formats. The default view is a BOSS811 representation of the raw data transmitted by your state 811 agency.
Click on the [One Call Format] tab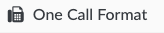 to view the raw audit report as sent by your 811 agency.
This report will highlight any service requests not closed/resolved.
Click on a Ticket ID number to open that specific ticket.
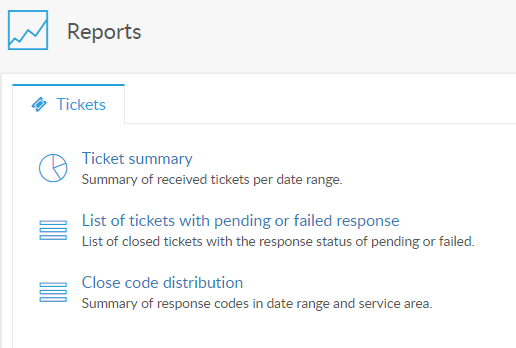
Reports
The Reports section will display a list of available reports.
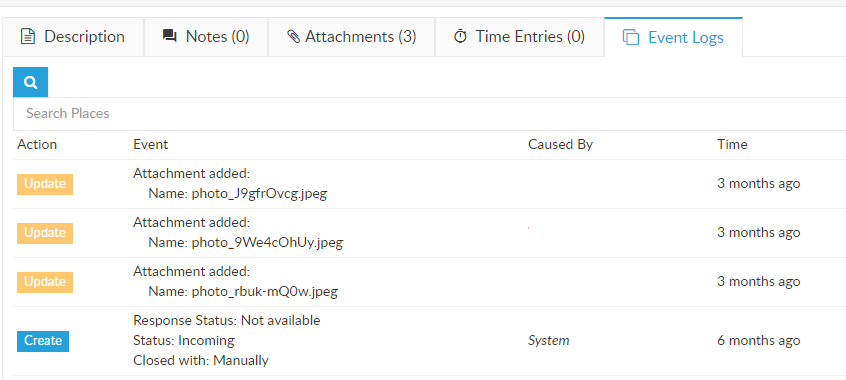
Event Logs
BOSS811 Event Logs track all changes made to tickets in the application. It records who took the action, the type of action taken (with before/after values when applicable), and when the action was taken.
Each item in the Event Log includes the name of the user, the object affected by the action, an action type (create, update), a ‘before’ and an ‘after’ summary of the action taken and a date/time stamp of when the action was taken.
The list can be filtered by user and object type (attachment, note, ticket routing rule, ticket, ticket response, and user). A count of the selected items is shown in the upper right corner of the window.
Admin
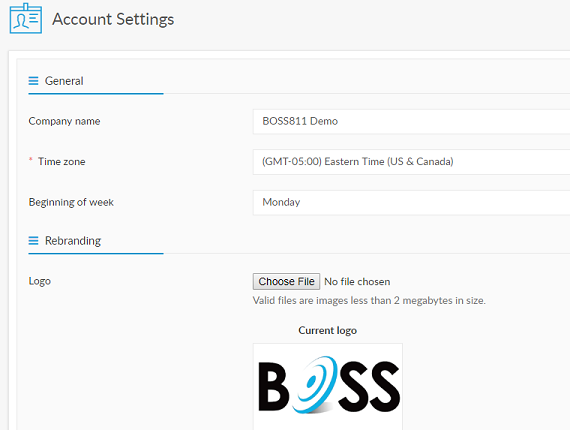
Account Settings
General
You can modify basic information associated with your organization. Use the [Save] button to store any changes. Use the [Cancel] button
 to abandon any changes.
- Company name - Free-form text field. This is the name that will be associated with this account.
- Logo - (? recommended size/dimensions ?)
- Time zone - Drop-down list of supported time zones. Used to define the local time for time-based triggers and processes.
- Beginning of the week - You can send the day for the beginning of the week
Attachment Upload
- Max attachment resolution - Set the resolution of the attachment
- Max attachment size - Set the mamimum attachment size (in megabytes)
- Allowed file extensions - Set the allowed file extensions e.g. png, jpeg, csv

User Management
Roles
Roles are used to associate a subset of selected types of access and activity levels. Roles are a flexible way to define the responsibilities of a position. A user can be given multiple roles and the highest level of access/capability will be granted.
-
New role - Define a new level of responsibility and access.
- Name - Free-form text field to uniquely identify this new role.
-
Permissions - Categories of functions and the types of access that can be granted for that function.
-
Roles - Defines the access level this position will require to manage other roles.
-
List - Create a list of all existing roles.
- Create - Define new roles and assigned new levels of functional responsibilities.
- Update - Make changes to existing roles.
- Delete - Remove a role and any responsibilities granted by that deleted role.
- Users - Defines the access level this position will require to manage other users.
- List - Create a list of all existing users.
- Show details - (? - What does this do - ?)
- Show API key - Display assigned API keys for user accounts.
- Create - Define new users and assign role.
- Update - Make changes to existing users and their roles.
- Delete - Remove a user.
- Custom fields - Defines the access level this position will require to manage custom fields.
- List - Create a list of all existing custom fields.
- Create - Define new custom fields.
- Update - Make changes to existing custom fields.
- Delete - remove a custom field.
- Tags - Defines the access level this position will require to manage tags.
- List - Create a list of all existing tags.
- Create - Define new tags.
- Update - Make changes to existing tags.
- Delete - Remove an existing tag.
- Tickets - Defines the access level this position will require to manage tickets.
- View all - Access to all ticket history.
- Update - Make changes to existing/open tickets.
- Close - Assign completion codes to tickets.
- Reopen - Capability to re-open a Completed/Closed ticket.
- Audit messages - Defines the access level this position will require to manage audit messages.
- List - Create a list of all of the existing audit messages.
- Show details - (? - What 'detail' is controlled - ?)
- Ticket routing rules - Defines the access level this position will require to manage routing rules.
- List - Create a list of all of the existing routing rules.
- Create - Define new routing rules.
- Update - Make changes to existing routing rules.
- Delete - Remove a routing rule.
- Email notifications - Defines the access level this position will require to manage email notifications.
- List - Create a list of all of the existing email notifications.
- Update - Make changes to existing email notifications.
- Saved searches - Defines the access level this position will require to manage saved searches.
- Create - Define a new advanced search and save it to the list.
- Update - Make changes to existing saved searches.
- Delete - Remove a saved search
- Account - Defines the access level this position will require to manage account and billing information.
- Update account and change plan - Make changes to account information. Make changes to service plan for this account.
- Update billing info - Make changes to the billing information for this account.
- Cancel account - Close this account through the web service.
- Change logs - Defines the access level this position will require to manage 811 change logs and change log history.
- List - Create a list of the change logs.
- Check all/uncheck all - Select all options or deselect all options.
-
Edit role - Make changes to existing list of roles.
- Edit all - This screen presents all of the defines roles as a grid of checkboxes. This allows a quick comparison of role capabilities. Click [Save all] to commit changes.
- Delete role - Remove an existing role.
Notifications
E-mail Header and Footer
- Insert placeholders - Click on the relevant palce in the subject or text field and add the placeholder. Placeholders will be converted into the appropriate data.
- E-mail header - Add a custome email header
- E-mail footer - Add a custome email footer

Notifications
This lists all of the potential trigger points that take place when a utility locate service request is transmitted from your 811 service provider or when it is updated throughout the life of that ticket. Each notification may be edited to make changes to associated email notification rules.
Ticket Management
Call Centers
- Provider - Set a provider to start setting up your call center
- Provider - set your provider
- Name - Give your call center a meaningful name
- Enable - Turn the call center on or off
- Split tickets by service area - enable or disable this option
- Service Areas
-
Defines all of the utility location service codes associated with this account. These are transmitted by the 811 service to all utility locate service providers that might be impacted by a utility locate service request. These codes are assigned by your 811 service provider.
-
Adding a service area - Click on the [+ Add Service Area] button
 to define a new service area. NOTE: Any new codes must be assigned by your 811 service agency before defining them as a new service area. When you click on the [+ Add Service Area] link. It creates a new numbered Service Area. There is a free-form text box to enter the 811 service agency-assigned service area code.
 -
Deleting a service area - Click on the [x] on the far right of the service area code you will delete from the application.
-
-
Request From 811
- Email address - Defines the technical account information provided by your 811 service provider.
Response Codes
- Click on the blue plus icon to create a new response code
- Call center - Select the call center the response code is send to
- Code - Enter the response code that was given to you by your provider
- Description - enter a description for the response code
- Ticket types - Allow the response code for all tickets or choose which ticket types are able to send the response code

Map Services
Map services allows you to integrate with your maps for real time mapping - Call Center - Select the call center for the map services - Visibility - Set the visibility to all users or limit the view by the user roles - Service type - select the service type for the map service - ArcGIS - Give the service a name and add the URL. You will then add the auth token generation URL. Enter user name and password followed by clicking on save - KML/KMZ file - Add a URL to the KML file or manually upload the KMZ file. Enable if the service can be used in routing. - GeoJSON - Give the service a name and add the URL to the GeoJSON file
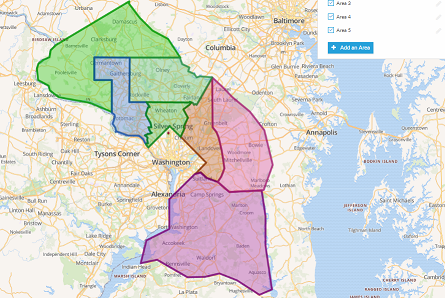
Map Areas
Map areas allows you to draw separate service areas that can then be used in polygon based routing
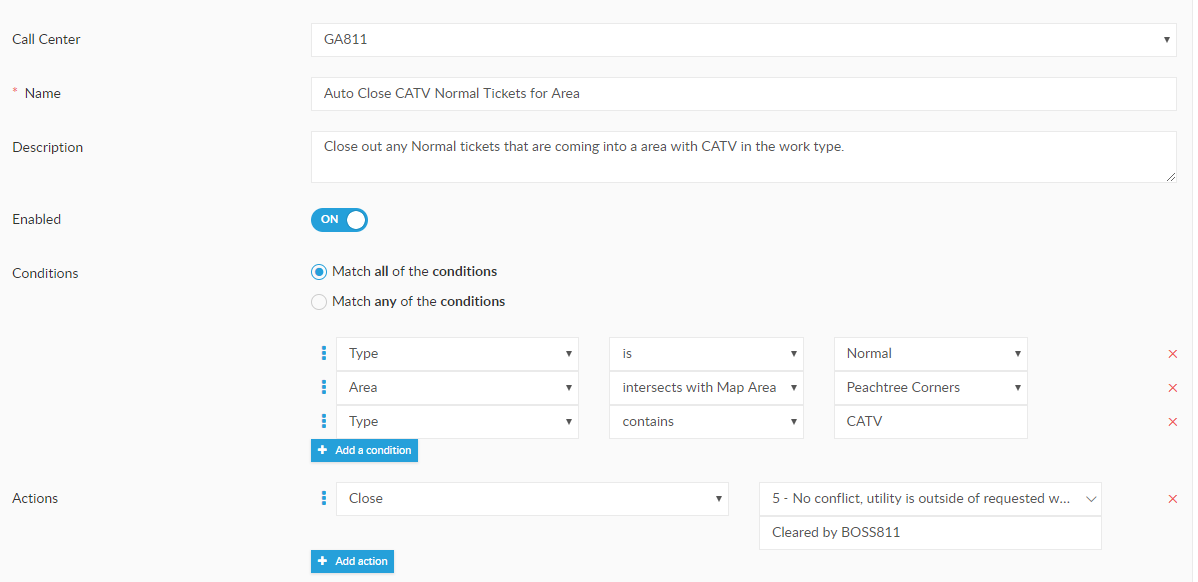
Routing
Trigger points initiated by a ticket action, such as ticket creation, ticket update, ticket closure.
-
New rule - Define a new routing rule
-
Call Center - Select the call center the rule will be applied to
- Name - Unique title for this routing rule.
- Description - free form description of this routing rule. Describe the triggering circumstances and the resulting action.
- Enabled - Checkbox to active/deactivate a routing rule.
- Condition - Defines whether a routing rule passes if any or all conditions are met.
-
Conditions/Actions - Defined after the routing rule has been saved. Use the Edit function to edit the existing routing rule to define Conditions and Actions.
-
Edit - Make changes to an existing routing rule. The changes are activated when the changed have been saved.
-
Name - Make changes to an existing routing rule name.
- Description - Make changes to the description of an existing routing rule.
- Enabled - Change whether this routing rule is activated/deactivated.
-
Conditions - Change whether a routing rule passes if any or all condition are met.
-
Conditions
- drop-down box - Lists ticket characteristics that can be tested.
- (action) - Defines whether the value of a characteristic should match a selected value or if it should not match.
- Characteristic value - A drop-down list of the characteristic values.
-
Actions - The event triggered when a set of conditions are met, whether individually or all conditions are satisfied.
-
drop-down list of actions - Lists the available actions.
- drop-down list of recipients - Lists those users that can receive an actionable item.
-
-
Enable/Disable - Indicates whether each routing rule is enabled or disabled.
- Copy - Make a copy of an existing routing rule with a new name.
- Delete - Delete an existing routing rule.
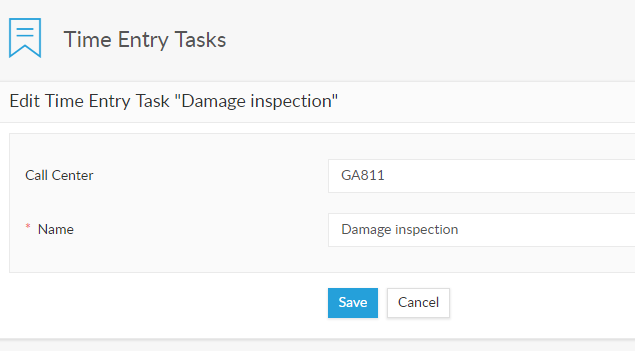
Time Entry Tasks
Add any tasks that you would like to track time on. Click on the blue plus icon to add a new time entry task.
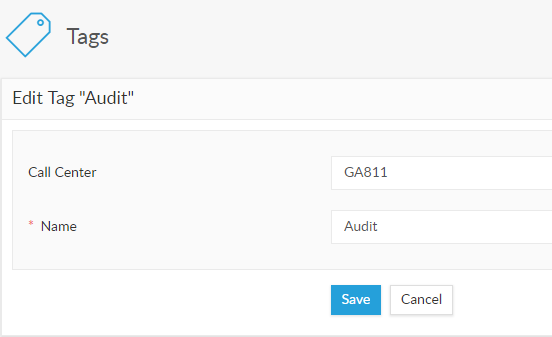
Tags
Manage the list of available tags. tags can be assigned to tickets manually or they can be assigned through ticket routing rules. Click on the blue plus icon to create a new tag.
- New tag - Define a new tag value
- Edit - Change an existing tag value.
- Delete - Remove an existing tag.
Custom Fields
Defines additional/custom fields associated with any new utility locate service requests. A dynamic count of defined custom fields is displayed in the upper-left corner of the Custom Field screen.
New Custom Field
[New custom field] button add a new custom field. This new custom field will be applied to all new utility locate tickets.
-
Field type - The characteristic of the custom field.
- Single-line text
- Multi-line text
- Link/URL
- Integer
- Float
- Date
- Boolean
-
Dropdown list
-
Name - Text label associated with this custom field.
- Required checkbox - If checked, a utility locate service request ticket cannot be completed/closed until this custom field has been satisfied.

Edit
Click on the [Edit] button to change any properties associated with this custom field.
Delete
Remove this custom field from future utility locate service request tickets. This custom field will not be available in any Advanced Search field lists or in any Reporting functions.
Business Hours
Set your Regular business hours and After business hours
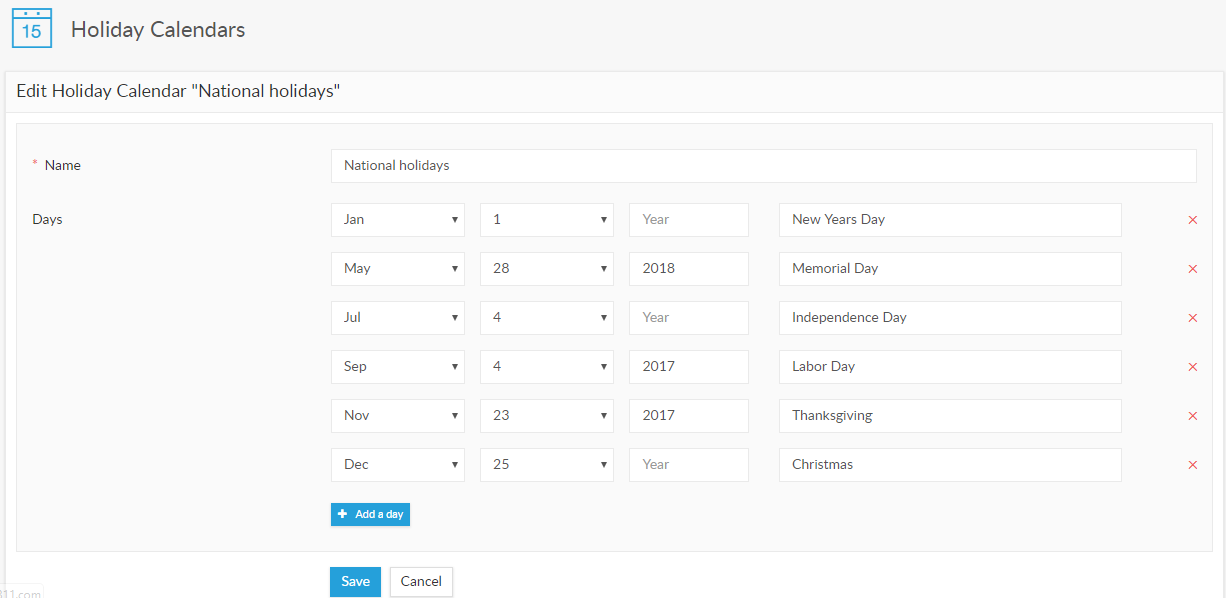
Holiday Calendars
Set your holiday calendar
Dashboard Widgets
Dashboard widgets are dynamic graphic representations of production data. They provide a summary of the production environment. Data points can be monitored in order to focus on the exceptions. They are a picture of the health of the business process.
Each widget has an icon to the right of the widget name:
 - Click to add this widget to the Dashboard page
Add a widget
Go to the Settings - Dashboard Widgets to view a list of available widgets. Click on the '+' to add the widget to the dashboard.

Remove a widget from the Dashboard
On the Dashboard screen, click on the 'x' in the right side of a widget to remove that widget from the Dashboard.
Enable/Disable
Shown on the Email Notification screen. indicates whether this trigger point is currently active and being considered when any tickets are added or modified.
Trigger types/Actions
- New ticket when assigned - This event is defined when a utility locate service request is received from your 811 service provider and it is assigned to a technician. This services as notification to the technician that they need to take action for a new utility locate service request.
- New ticket when unassigned - This event is defined when a utility locate service request is received from your 811 service provider and it is not assigned to a technician. This could be a notification to a manager that a new request has been received and should be reviewed for action.
- New ticket closed - This event is defined when a utility locate service request is received from your 811 service provider and it is automatically closed by a ticket routing rule. This could be a notification to a manager that a new request has been received and it was closed, requiring no further action.
- Ticket assigned - This event is defined when a utility locate service request has been assigned to a technician.
- Ticket updated - This event is defined when a utility locate service request ticket has been updated by a technician.
- Note added to ticket - This event is defined when a utility locate service request ticket has a new Note added to the ticket.
- Ticket closed - This event is defined when a utility locate service request ticket has been closed/completed.
Recipients
The list of roles who will receive an email notification.
- Role recipients - List of the types of Roles defined in the Roles section
- User recipients - List of the users currently defined in the Users section.
Notify assignee
Checkbox to define when the assignee should receive a copy of this email notification. Beneficial to test/validate new email notifications.
Placeholders
These can be used to place ticket-specific information into the body of an email notification.
- Recipient first name - Uses the User Information to determine if a value had been entered into the First Name field. If so, this value will be inserted into the email message.
- Ticket request number - The assigned ticket ID.
- Ticket assignee name - Inserts the name of the Assignee associated with the ticket.
- Ticket web address - A URL link that will display information about this ticket.
- Ticket response code - The ticket response code assigned to this ticket.
Email subject
This will be the Subject line of the delivered email notification.
Email text
This will be the body of the delivered email notification.